

Guide to Replacing a Bathroom or Sink on a Budget
Replacing a toilet or sink might sound like a big job, but it doesn’t have to drain your wallet or your patience. With the right plan, a few basic tools, and some helpful guidance, you can update your bathroom without spending a fortune. Whether you’re a homeowner tackling your first plumbing project or simply looking to cut costs, this guide will walk you through practical, money-saving steps to replace a toilet or sink efficiently and safely. If you need professional help for smaller jobs, you can also explore small plumbing repair services in the USA.
Why Replace Instead of Repair?
Over time, toilets and sinks can develop leaks, stains, or cracks. Sometimes, fixing them repeatedly costs more than replacing them. Older fixtures also use more water, which increases monthly utility bills. Installing a newer, efficient model can improve performance and reduce water use.
A replacement is also a simple way to refresh your bathroom’s appearance without remodeling the entire space. Whether you’re upgrading to a modern toilet or adding a sleek sink, small changes can make the room feel new again.
Planning Your Budget
Before buying anything, decide how much you’re comfortable spending. Your budget will guide your choices on models, materials, and any extra help you may need.
Things to include in your budget:
-
Cost of the new toilet or sink
-
Plumbing supplies (wax ring, hoses, sealant, caulk, etc.)
-
Basic tools (if you don’t already have them)
-
Disposal or recycling fees for old fixtures
-
Optional: plumber or handyman services for installation assistance
You can find good-quality toilets starting around $120 and sinks for under $100. If you’re replacing both, plan for around $300–$500 total, depending on brand and style.
Choosing the Right Toilet or Sink
For Toilets:
Look for water-efficient models with a WaterSense label. These use less than 1.28 gallons per flush, saving hundreds of gallons each year. Also, check the rough-in size—the distance from the wall to the center of the drain hole. Most homes use a 12-inch rough-in, but older homes might differ.
For Sinks:
Measure your space carefully. Decide whether you want a pedestal, wall-mounted, or vanity sink. Pedestal sinks save space, while vanity sinks add storage. Choose a material that fits your style and budget—porcelain is classic, stainless steel is durable, and resin or composite options are budget-friendly.
Tools and Materials You’ll Need
Gather all your tools before starting. This saves time and prevents frustration once water is turned off.
Basic tools:
-
Adjustable wrench
-
Screwdriver
-
Bucket and sponge
-
Putty knife
-
Plumber’s tape
-
Towels or rags
-
Level
Materials:
-
New toilet or sink
-
Wax ring (for toilet)
-
Supply hoses
-
Silicone caulk or plumber’s putty
-
New bolts or washers (if needed)
Step-by-Step: Replacing a Toilet
1. Turn off the water.
Find the shutoff valve near the base of the toilet and turn it clockwise. Flush to drain most of the water from the tank and bowl. Use a sponge or towel to remove the remaining water.
2. Disconnect and remove the old toilet.
Use a wrench to loosen the bolts at the base. Disconnect the water supply line. Carefully lift the toilet straight up and set it aside on a towel. Remove the old wax ring with a putty knife.
3. Prepare the new toilet.
Place a new wax ring on the flange (the metal or plastic ring on the floor). Align the toilet with the bolts and lower it into place. Gently rock it to seal the wax ring. Tighten the bolts evenly, but don’t overtighten.
4. Reconnect the water line.
Attach the supply line, turn the valve back on, and let the tank fill. Flush a few times to check for leaks. Apply a bead of caulk around the base for a clean finish.
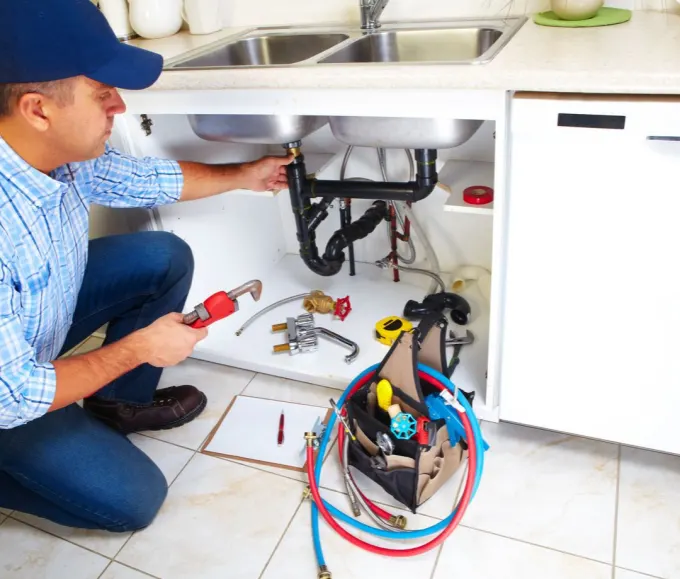
Step-by-Step: Replacing a Sink
1. Shut off the water supply.
Turn off both hot and cold water valves. Open the faucet to release pressure.
2. Disconnect plumbing lines.
Place a bucket under the pipes. Loosen and remove the P-trap and supply lines.
3. Remove the old sink.
If it’s a drop-in model, cut through any caulk and lift it out. For a pedestal or wall-mount, remove the mounting bolts or brackets.
4. Install the new sink.
Apply plumber’s putty around the drain opening. Position the sink and secure it using brackets or mounting hardware. Reconnect the supply lines and P-trap.
5. Test for leaks.
Turn the water back on and let it run for a few minutes. Check all connections and joints. Tighten any loose fittings and wipe away excess putty.
Simple Ways to Save Even More
-
Reuse parts if they’re still in good condition, like supply hoses or mounting brackets.
-
Shop at outlet or clearance sections in home improvement stores.
-
Check local recycling programs for rebates on water-saving fixtures.
-
Do the prep work yourself, such as removing the old fixture before hiring help.
-
Bundle services if you need multiple repairs—some handymen offer discounts for combined jobs.
Common Mistakes to Avoid
-
Skipping measurements: Always double-check dimensions before buying.
-
Forgetting to turn off the water: A simple mistake that can cause a mess.
-
Overtightening bolts: This can crack porcelain or strip threads.
-
Ignoring small leaks: Even a slow drip can waste gallons over time.
Being patient and methodical helps avoid costly errors. Take your time during each step and inspect everything carefully.
Maintenance Tips After Installation
After replacing your toilet or sink, regular maintenance keeps them in top shape.
-
Clean weekly using non-abrasive cleaners to prevent buildup.
-
Check connections monthly for moisture or corrosion.
-
Inspect caulking around the base and reapply if gaps appear.
-
Flush safely: Avoid flushing wipes or heavy paper to prevent clogs.
-
Run hot water occasionally through bathroom sinks to clear residue.
Routine upkeep extends the life of your fixtures and helps prevent future plumbing issues.
Trending FAQs
1. Can I replace a toilet or sink myself without hiring a plumber?
Yes, many homeowners successfully handle this project themselves. If you’re comfortable using basic tools and following instructions, you can save money by doing it yourself.
2. How long does it take to replace a toilet or sink?
Most replacements take two to four hours, depending on your experience and whether any plumbing adjustments are needed.
3. What’s the best toilet for saving water?
Look for dual-flush or WaterSense-certified toilets. They use significantly less water per flush while maintaining strong performance.
4. Should I replace the shutoff valves too?
If they’re old or hard to turn, yes. Replacing them during installation saves time and prevents future leaks.
5. How often should I replace a toilet or sink?
Most toilets last around 15–20 years, while sinks can last even longer with good maintenance. Replace sooner if you notice cracks, leaks, or persistent issues.
Final Thoughts
Replacing a toilet or sink doesn’t have to be intimidating or expensive. With careful planning and a few hours of work, you can improve your bathroom’s look and efficiency on a reasonable budget. Remember, small updates can make a big difference over time.
If you decide to get professional help for installation or repairs, reach out to Magic Touch Handyman for reliable and affordable home improvement services. Their team can assist with plumbing, repairs, and many other household projects, helping you keep your home in great shape without overspending.